First steps
The first step to a successful ICF installation is an accurate footing or slab. This means a footing or slab that is:
- Code compliant
- Designed in accordance with construction drawings and specifications
- Designed to account for soil conditions, seismic area, number of stories, building loads, and water tables.
STEP 1
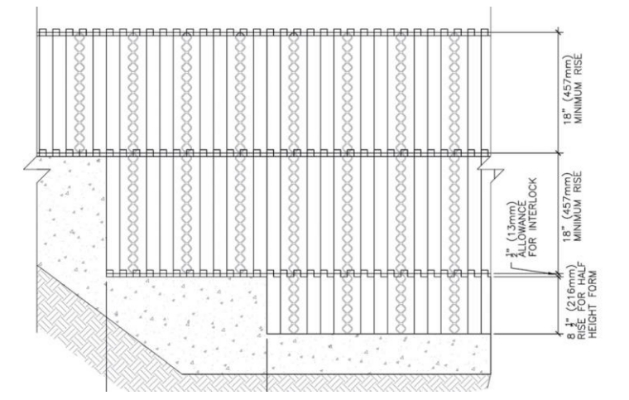
Confirm that all footing forms are flush to one another. Accuracy is key at this step and will save you a lot of time when erecting the walls. Using stakes to hold the footing shape and height, nail the footing forms to the stakes at an equal height with a laser level. If steps are required in your footing, ensure that your upper footing and lower footing are the difference of an exact block height multiple.
- If your block size is 18” tall, make sure the difference between the upper and lower footings is a multiple of 18”: 18, 36, 48, etc.
- If you have more than one step between upper and lower footings it is best to have the difference between each step be the height of one block. The steps can NOT exceed 24” tall, and not be less than 24” long.

STEP 2
Place rebar in footing as required by the local building code requirements, OR as indicated by engineering.
STEP 3
Strike off concrete and trowel the footing as flush to the top of your footing boards as possible.
STEP 4:
Insert footing L - dowels, which will consolidate your footing and wall pours and counteract lateral shear force.
